
Building a Telegram bot with Node.js, AWS Lambda and GraphicsMagick

Building a chatbot not only simplifies the work of a developer, but it also improves the user experience: you do not need to install any app or open a website - chatbot is always with you in your messenger.
In this article we will create a chatbot that is capable to create phone mockups from your images.
Table of Contents
Functionality of MOCA bot
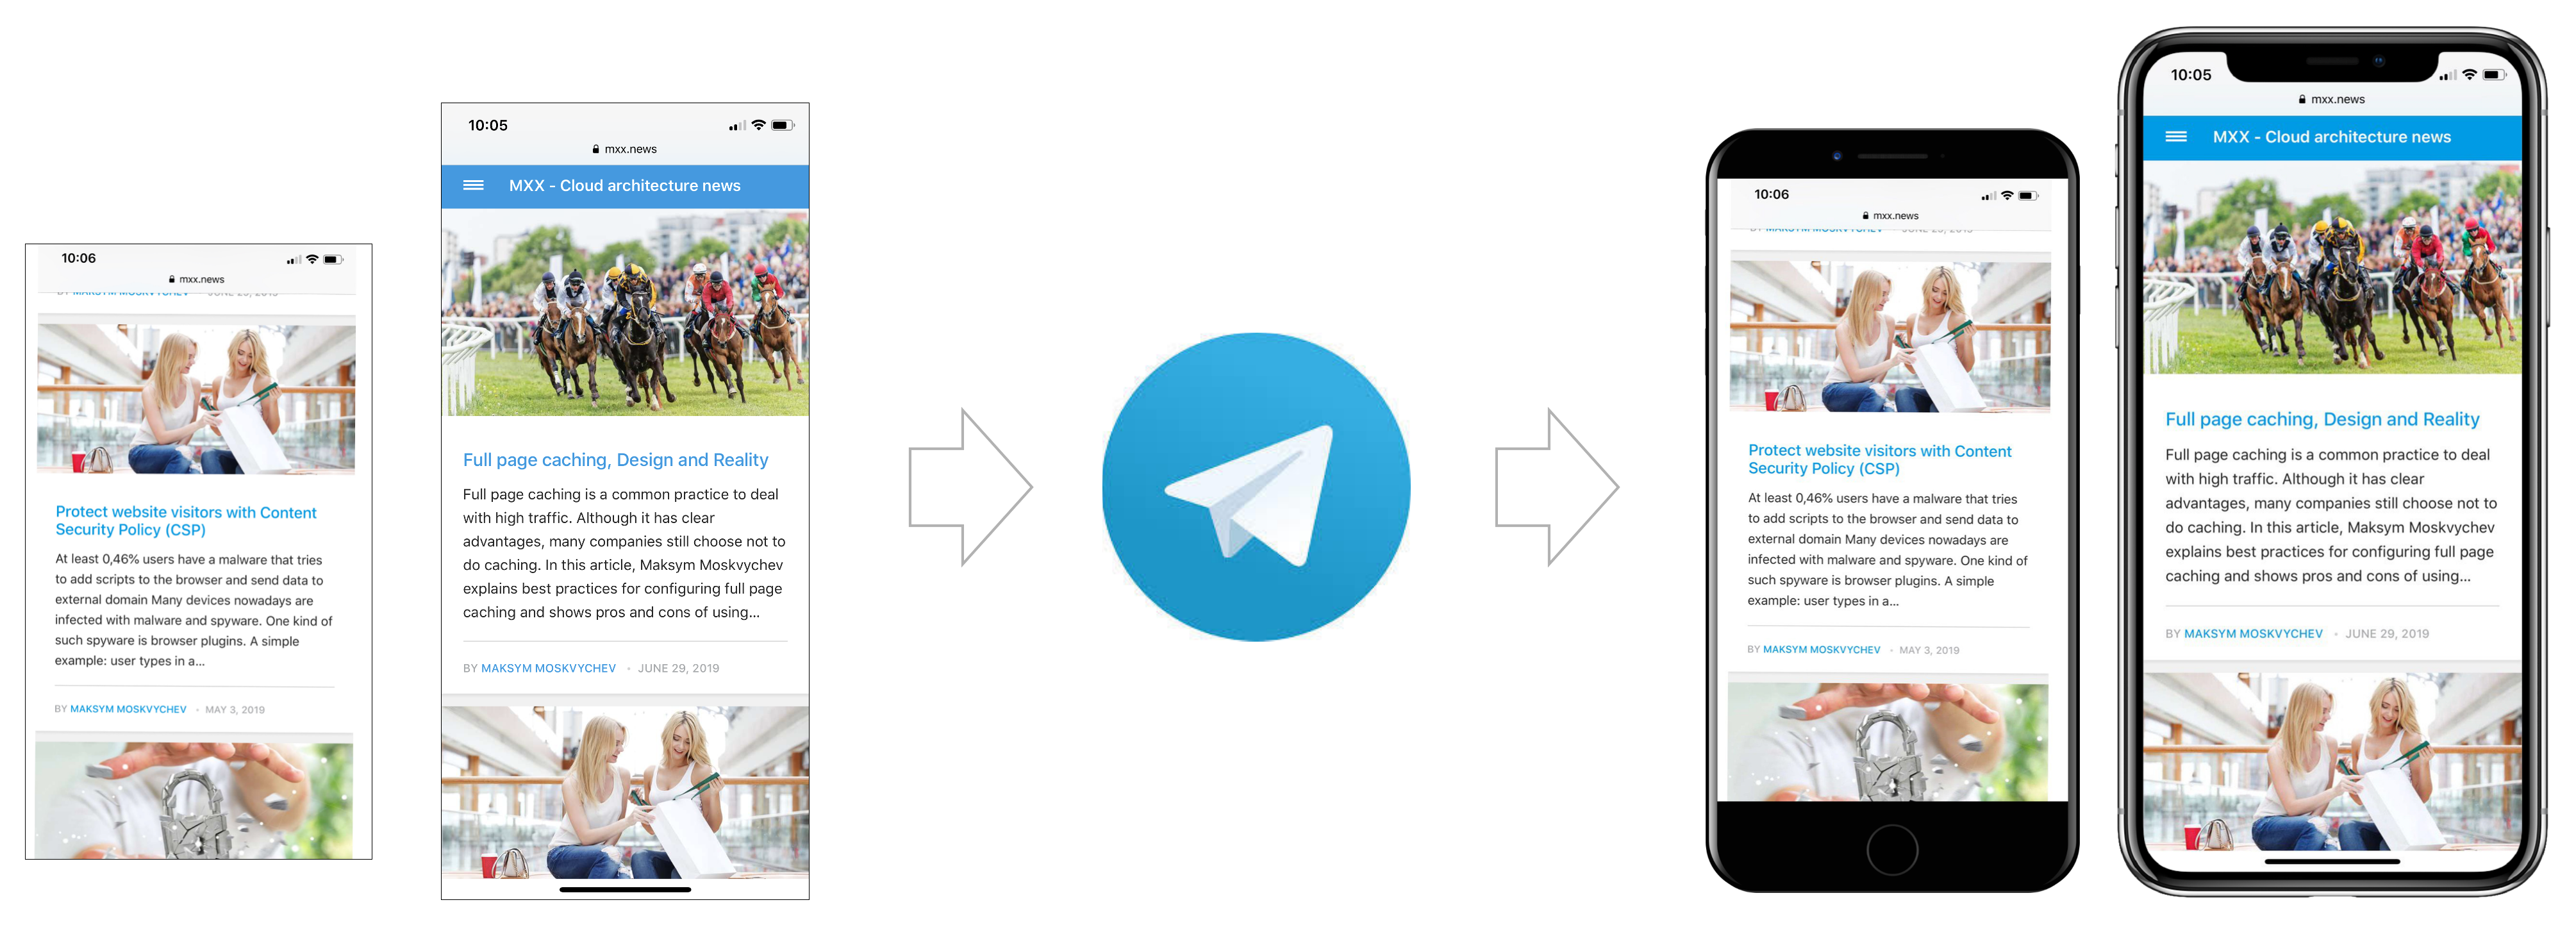
Try it yourself! Send a message to MOCA bot and the bot will add a frame to your image, it will fit your picture into a mockup of mobile phone. Make sure you have a Telegram messenger to access this bot.
You can use the generated image in PowerPoint presentations to present a design of a mobile website or to show an app.
Why MOCA is a telegram bot? It is very handy to see a history of all the images you've sent and mockups you received back. Telegram chat history is a great solution for this.
MOCA bot also takes seriously about security. Conversation with a bot is not stored on any bot server. If you send an image to the bot - it is stored for 1 day, and removed afterward.
Bot architecture
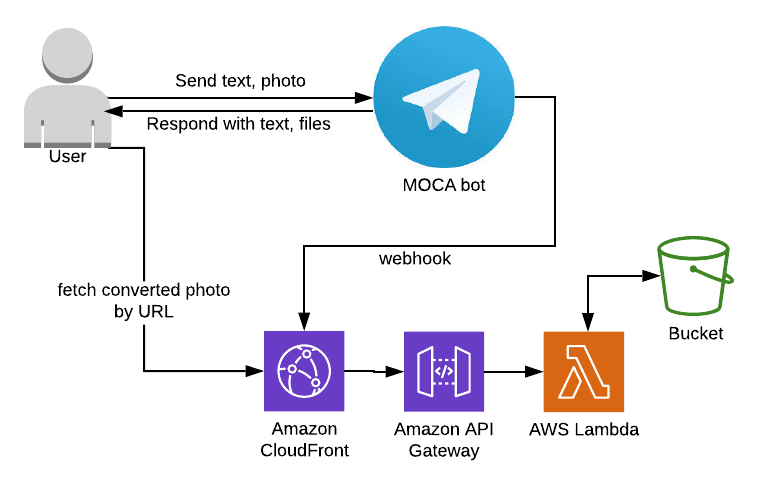
There are 3 actors on this diagram: User, Telegram itself and our Chatbot infrastructure (represented by CloudFront, API Gateway, Lambda, and S3 bucket). A success flow for the MOCA bot looks following:
- The User sends an image to Telegram Bot. Telegram forwards request via Webhook to a Lambda function (via Cloudfront and API Gateway)
- Lambda function saves the image to the S3 bucket and performs image validation. If validation is successful - it generates a link to fetch a converted image.
- Lambda replies to Webhook with a link to the converted image.
- The User downloads a converted image by the link. The link URL leads again to Lambda function (via CloudFront and API Gateway)
- Lambda parses a link, downloads the mentioned image from S3, converts it and sends an image back in response. The response goes via CloudFront, so in case of the same image is requested again - a cached content will be returned.
- After one day image is permanently removed from S3 due to bucket lifecycle settings.
Technology choice explained
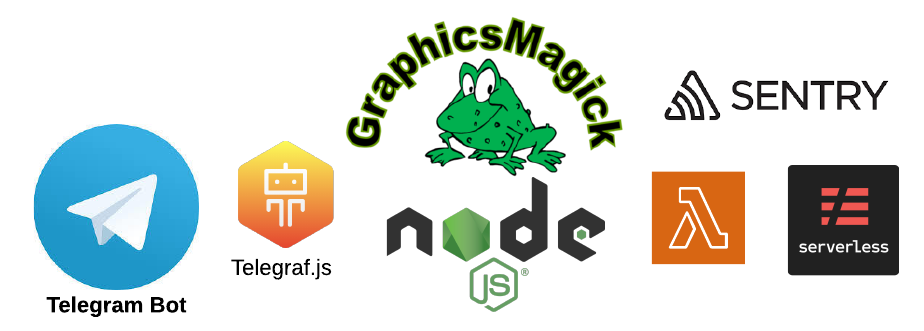
In this article, we are building a Telegram bot using technologies like: Telegraf.js, Node.js, GraphicsMagic, AWS Lambda and Serverless. Let's discuss why these technologies were chosen.
Telegram Messenger is very user-friendly for bot developers. To create a bot - just send a message to BotFather. No application is needed on behalf of your company, no Facebook page to create for a bot, etc..
Telegraf.js is a modern framework to build Telegram bots. It gives you an interface to send and receive messages and build discussion flows.
Node.js is a language of choice if you are using AWS Lambda and want to deploy them with Serverless. It allows to add libraries to your Lambda function using npm package manager, and also Node.js is needed if we are using Telegraf.js
GraphicsMagic is a low-level library to process images. When you open an image on your Windows/Mac/Linux computer you are probably using it. The benefit of GraphicsMagic over Node.js libraries, like Sharp, is a support of a larger variety of formats. For example, the iPhone makes screenshots and photos with color depth 64bit. Sharp still able to process them, but it will automatically change colors to 32bit, which is clearly seen on a bright image. So if you are working with images and you demand quality - just go for GraphicsMagic.
AWS Lambda is a great solution for hosting a chatbot. The pricing model is that you pay for what you use. It means that you need to have thousands of conversations with your bot, and hosting price will be just a couple bucks or even cents per month.
Serverless is a framework to deploy your application. It can deploy Lamdba together with other AWS services you might need, such as API Gateway, CloudFront and S3 bucket.
Sentry is a bug reporting system, it is especially handy when your application runs on Lambda. You will see all the (possible) errors that your bot is facing without digging into Lambda logs.
Bot sends first message.
To start a bot development please create 2 files: handler.js with bot logic, and serverless.yml to deploy the bot to AWS.
handler.js - with bot logic.
const Telegraf = require('telegraf');

module.exports.webhook = async (event) => {
    let body = event.body[0] === '{' ? JSON.parse(event.body) : JSON.parse(Buffer.from(event.body, 'base64'));
    const bot = new Telegraf(process.env.TELEGRAM_API_TOKEN);

    bot.hears('hi', ctx => ctx.reply('Hello from bot'));

    console.log('Request: ' + JSON.stringify(body));
    await bot.handleUpdate(body);
    return {statusCode: 200, body: ''};
};
serverless.yml - in order to deploy a Telegram bot to AWS.
service: mybot

provider:
  name: aws
  runtime: nodejs8.10
  stage: prod
  region: us-east-1

functions:
  webhook:
    handler: handler.webhook
    timeout: 30
    events:
      - http: POST /secret_path
To deploy the bot run following commands (assuming you have installed locally node, serverless and you have an AWS account):
npm install sls deploy
Time to test! Open your bot in Telegram. Write to it "hi". You should hear back "Hello from bot".
Didn't work? Contact me, maybe I can help you out.
Debugging.
Sometimes it's pretty hard to debug bots, deployed to Lambda. There are a few options though:
- CloudWatch logs. This option is available by default. You can see all your Lambda logs for all times. Every time you use console.log() in bot code - output will be stored in CloudWtch logs. These logs are available on AWS Console. To find a right log stream - go to your Lambda function, then switch to tab "Monitoring" and then click button "View logs at CloudWatch".
- Offline mode in Serverless allows executing simulate execution of Lambda function locally. A typical workflow with bots is to first run it on Lambda, then copy request body from CloudWatch logs, and then repeat the same body using REST client locally, together with serverless offline.
- Sentry.io integrates fine with Telegraf.js and can record all the errors bot encounters. For the Sentry integration use following code snippet during bot initialization:
    const Sentry = require('@sentry/node');
    Sentry.init({ dsn: process.env.SENTRY_DNS });
    bot.catch((err) => {
        Sentry.captureException(err);
    });
Processing images with GraphicsMagic in Lambda.
There is an npm package to work with GraphicsMagic - gm. But in order for it to work you need to have GraphicsMagic dll libraries inside of Lambda function. Adding GraphicsMagic to Lambda deserver a separate article, the quick guide:
1. Start an EC2 instance (we need a machine with Amazon Linux) and compile GraphicsMagic inside:
# Execute in ec2 with latest  Amazon Linux
sudo yum -y install libpng-devel libjpeg-devel libtiff-devel gcc
curl -O https://sourceforge.net/projects/graphicsmagick/files/graphicsmagick/1.3.31/GraphicsMagick-1.3.31.tar.gz
tar zxvf GraphicsMagick-1.3.31.tar.gz
cd GraphicsMagick-1.3.31
./configure --prefix=/var/task/graphicsmagick --enable-shared=no --enable-static=yes
make
sudo make install
tar zcvf ~/graphicsmagick.tgz /var/task/graphicsmagick/
sudo yum -y install libtiff5
yum -y install gcc-c++ libpng-devel libjpeg-devel libtiff-devel wget
sudo yum -y install gcc-c++ libpng-devel libjpeg-devel libtiff-devel wget
wget https://downloads.sourceforge.net/project/graphicsmagick/graphicsmagick/1.3.26/GraphicsMagick-1.3.26.tar.gz
tar zxvf GraphicsMagick-1.3.26.tar.gz
cd GraphicsMagick-1.3.26
./configure --prefix=/var/task/graphicsmagick --enable-shared=no --enable-static=yes
sudo make install
2. Copy .dll files from EC2 instance to folder /graphicsmagic in your project. You will need to copy following libraries: libtiff.so.5, libjpeg.so.62, libgomp.so.1, libjbig.so.2.0
3. Install GM with npm: npm install gm
4. Enable GM in you project using following code snippet:
//beginning of handler.js
const BIN_PATH = `${process.env.LAMBDA_TASK_ROOT}/graphicsmagick/bin/`;
gm = require('gm').subClass({
    imageMagick: false,
    appPath: BIN_PATH,
});
process.env.PATH = `${process.env.PATH}:${BIN_PATH}`;
process.env.LD_LIBRARY_PATH =  './graphicsmagick/lib';
After steps above are done you can simply use GraphicsMagic in your Lambda. For example, the code snippet below will resize file1.png to dimentions 1024x768 and will merge it together with file2.png:
gm.command("composite")
.in('-geometry 1024x768')
.in('/tmp/file1.png')
.in('/tmp/file2.png')
.write('/tmp/output.png', function (err) {
    if (!err) {
        console.log('gm composite OK');
    } else {
        console.log('gm composite error');
        console.log(err);
        reject(err);
    }
});
Lessons learned
Chatbots are awesome :) If you need to build some functionality and make it available online - it is much easier to do a bot then a website or an app because you do not spend time on building a user interface.
Also, modern cloud solutions like AWS Lambda with "pay as you go" model allows us to host and run chatbots almost for free. Backed with Serverless as a deployment solution it's a joyful combination, that allows to creating a production-ready bot in minutes.